How to Scan Handwritten Recipes

![]() Posted on
Posted on
Scanning handwritten recipes is the best way to preserve age-old family recipes. There are many techniques to scan and edit handwritten recipes so that you get the best result for your future family cookbook. Your mother also likely had the habit of writing down everything, including age-old, classic recipes. Written recipes, on the other hand, are prone to tearing and fading. One way to preserve them is to scan handwritten recipes. So let’s show you how you can easily scan handwritten recipes at home.
Scanning Techniques
There are many ways to scan recipes. You can either scan via your phone, a high-end camera, or just scan directly via a desktop scanner. While these methods are different, they are equally effective. Let’s have a look at these different scanning techniques:
Scan Recipes with your Phone
If you have a phone with a decent camera, then scanning your handwritten recipes is pretty easy. Just follow these steps:
- Place the recipe on a flat surface with no distracting background patterns.
- Check if the lighting is adequate so that the photo can be as clear as possible. Standing near a light source or a window will help.
- Open any scanner app on your phone – I recommend Scanner Pro (there are many available on the App Store or you can even use the Notes app on your iPhone)
- Use your phone’s camera to scan the document by taking a photo of it. Don’t forget the back!
- If it turned out great, woohoo! If it wasn’t so hot, then simply retake it. Then, just tap Save.
Scanning with a Camera
If you don’t have a scanner at home, the best way to scan recipes is to use your digital camera to scan your recipe cards. Recipe cards come in a couple of sizes and it can get confusing if you’re trying to find the right one. If you are confused about what sizes recipe cards are, we have a guide about recipe card sizes here. Since digital cameras have high resolutions, the picture can be clear and print-worthy no matter the size.
Here’s how to scan recipes with a camera:
- Place the recipe card on a flat surface with adequate lighting
- Calibrate your digital camera for reliable color matching, if possible.
- Keep your hand steady or use a tripod to take the photo. Even a slight movement can lead to a blurry photo.
Pro tip – a fast shutter speed and well-lit area will help prevent this. - Make sure that camera settings like ISO are in line with the ambient light for a clear, well-lit photo.
- After the photo is saved in your camera, you can easily transfer these files to your computer to save them in appropriate folders.
Scanning Recipes with a Scanner
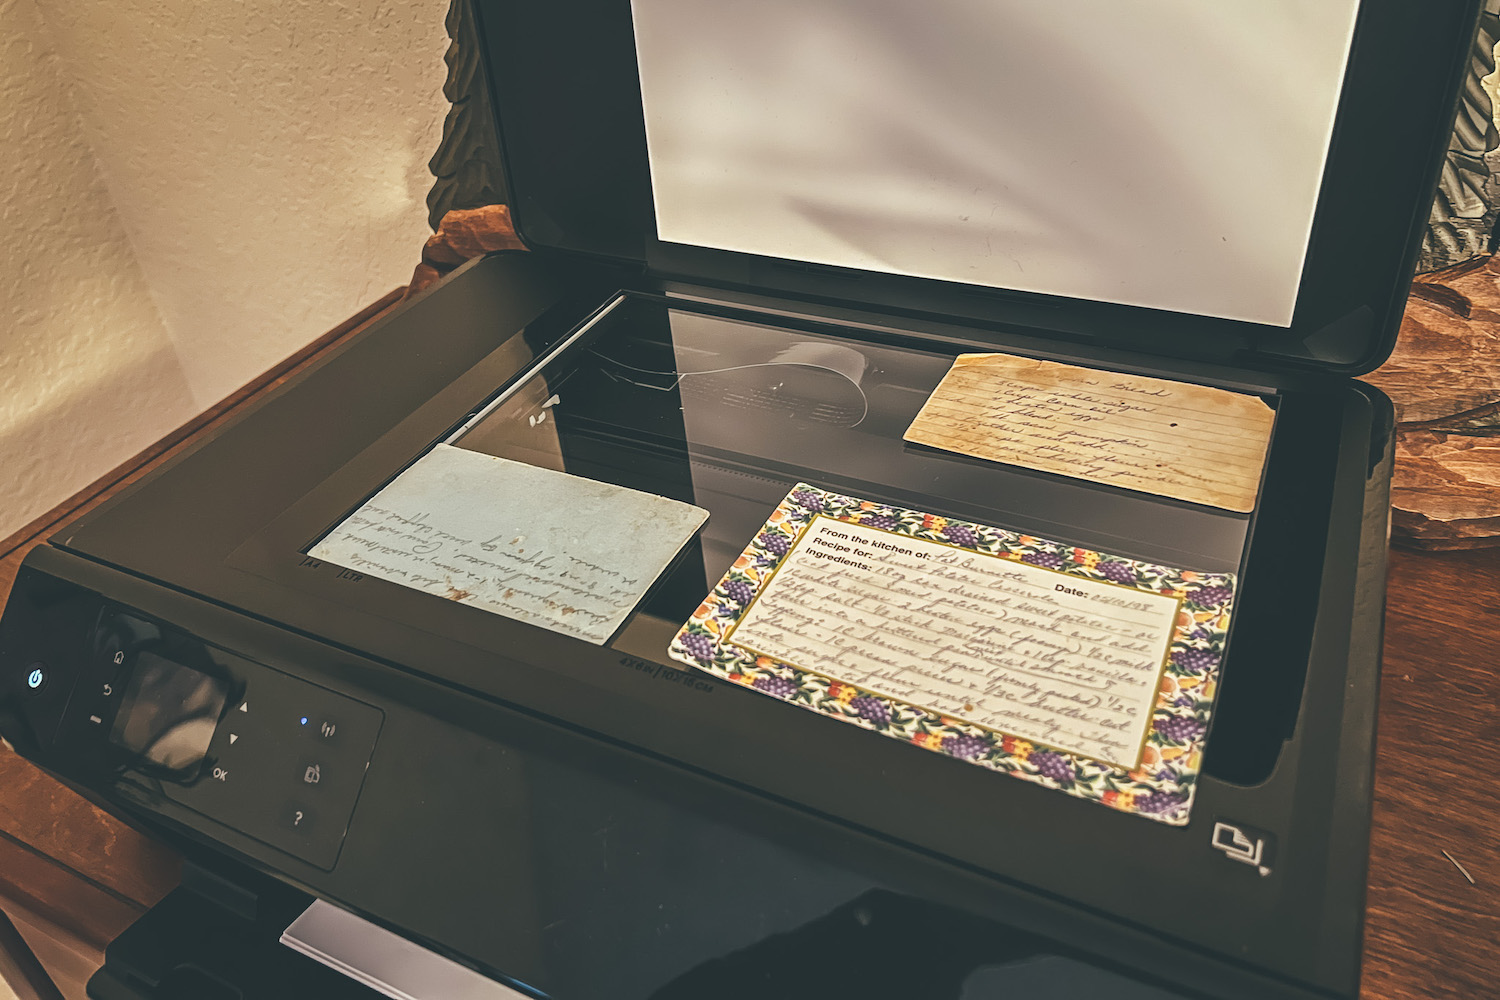
The best way to scan recipe cards is to scan them directly with a scanner. Not only is the picture crystal-clear, but, the whole process is much smoother and easier than any other method.
Here’s how to scan handwritten recipes with an at-home scanner:
- Check if your scanner is connected to your computer via a USB or local wireless network
- Open the scanning software. Click on Scan
- Check to see if the settings are set for the file types that you want to scan
- You can choose PDF or JPEG, depending on what you need
- Another setting you need to check is the image quality. Usually, 150 to 300 DPI (Dots per Inch) is high enough for including in your cookbook.
- Later, you can include the photo in your cookbook recipe
Editing Scanned Recipe Cards
After successfully scanning your recipe cards, you can edit them in any photo software of your pleasing so that the recipes are easy to read. Many times, cursive handwriting can be a little tough to read at a glance! (no offense, Mom!). But, there are ways in which you can make the whole process easier.
You can use software such as Morsel which makes it easy to add scanned recipes into a digital family cookbook. Here you can turn those tough-to-read recipes cards into an online family cookbook that anyone in your family can use for generations to come.
Sorting the Recipes
After scanning and editing all the recipes, it is time to organize them.
The better you organize your recipes, the easier it will be to turn them into a cookbook down the road. After sorting the recipes out in the way you want, you can make several different folders on your computer. You can categorize them as sweet or savory, lunch, breakfast, dinner, or favorite recipes, and so on. It all depends on your vision and how you would like to organize your cookbook.
Scanning Recipe Cards into a Cookbook
Now that you have scanned all your recipe cards, there are a few things you can do with them. The most useful thing is to turn the scanned recipe cards into a digital cookbook. Not only will you be able to use the cookbook when making your favorite dishes, but, you will be able to share your favorite recipes with your friends and family too by simply inviting your friends to your group!
You can also manually turn the entire scanned recipe card folder into a printed cookbook. While this may be a bit tough for an editor to do, it is not impossible. Since the computer sees the scanned recipes as photos and not text. So, it is tough to create titles, spaces, and indexes to create a cookbook.
Here, you can either use software like the one mentioned above or just enter the recipe title and leave the rest of the fields after “Recipe method”. Here, you can add the scanned recipe as it is.
Now that you know how to scan handwritten recipes, it will be much easier to make the family cookbook of your dreams! If your mom, sister, or any family member is looking to make a cookbook, then go ahead and share this article with them!

Ian Hoyt is a co-founder of Morsel – a family recipe cookbook software. When he isn’t working on building the best recipe app for your family Ian can be found hiking in the mountains of North Carolina, flying airplanes, or of course in the kitchen perfecting his beloved scone recipe.